Showing posts with label July. Show all posts

Thursday, August 5, 2010

Kim Schoenberger - ABCD 2

ABCD - Techniques....
Porcelain tiles - still in the raw stage:
A - Incising
B - Applied Decoration
C - Impression
D - Sprigg Decoration

Kim Schoenberger - D

D - Sprigg Decoration
Making spriggs are relatively easy and are great for repetitive, low-relief motif decoration on a clay surface. I've created my 'D' sprigg by carving into plaster with my trusty dremel as I did for my 'C' although, this time I've carved a larger negative space.
After tracing my letter D onto the plaster, I've carved to make the D. I liked the texture the carving tool created, when the clay is pressed in to make the sprigg, it'll give great texture in the clay.


A test is made (as above on right of plaster) with a small piece of clay to see if the D looks ok, this also takes away any fine plaster dust left from the carving. Taking another sprigg; finding it's final position, scoring both sides of the tile and the back of the D sprigg ...

...the two are joined gently.

Lots of care and a steady hand are needed here, making sure no air has trapped underneath, a good join... so it doesn't pop off in the firing and clean and neaten the edges.

D - sanded and ready for bisque firing.

Thursday, July 29, 2010

Letters on a rusted square

For my second alphabet I have chosen to use a font called Chiller. I chose it because it is reasonably free form and looks something like letters that are created by using a brush dipped in ink.


I have also chosen to work on squares of rusted thin metal sheets we had collected from the roadside collection. I am going to engrave the letters onto the metal and treat it with fixative as I want the contrast of the newly revealed metal against the rust.
I then will bend each square diagonally to create a shape that suggests a bird in flight.
The final piece I create from the whole alphabet will be like a flock of birds in flight.


Wednesday, July 28, 2010

Kim Schoenberger - C

C - Impression
Probably one of the oldest methods to make a mark onto the clay surface and has been used throughout all ages and cultures. Anything can be used to make an impression from found objects of organic or man-made materials, coarse open-weaved 'textured' fabrics to complex hand-made carved stamps!
I'm opting for somewhere inbetween, by carving my letter into a plaster tile and making a stamp in clay, *Bisque firing it, to then, press into the 'soft to leatherhard' clay.
Transfering the letter C into the plaster tile (I prepared earlier) with a pencil & transfer paper, leaving an imprint into the plaster.
To make a plaster tile; a small mix of plaster is poured into an ice cream container, once set hard it's poped it out making for a nice neat smooth edged tile to carve into.

To make the carving easier I'm using my Dremel with it's U-beaut pointy tool, just right for the fine lines. I used to do all my carving painstakingly by hand with a carving blade, e'ons later....! Finding the dremel has made life sooooo much easier it carves into plaster like butter.

Making the clay stamp from the carving...
Once the carving is done in the plaster tile the plaster dust must be cleaned out or it'll effect the imprint of the clay stamp were going to make. A ball of clay is rolled and flattened with pressure over the carving and a handle is attached... for easy stamping later.
* Bisque firing the stamp - generally before undertaking (the transfering and carving in these few steps above.... ) shrinkage is considered, the size of the C is increased the same percentage as the clay body shrinkage because in all firings clay bodies shrink and with each temperature a different rate of shrinkage... still with me? But seeing I'm fast tracking and am reasonably skilled enough I've cheated a little and made the tile the same size as the photocopied image; making the stamp and drying it off a little in the kiln to harden just a little and then carefully stamped into the clay.
Final result, C sanded and ready for bisque firing.

Saturday, July 24, 2010

Kim Schoenberger - B

I intend to post a letter a week so I can explain my process as I go step by step... mostly via images and inturn making my monthly report of all four letters shorter.

B - applied clay
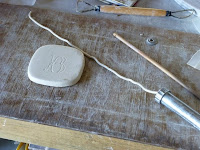
Using an extruder for icing cakes, porcelain clay is extruded through to make a small coil. A fine 'B' imprinted into the clay tile, via tracing paper.

...starting to build the letter by using the extruded coil, placed over the imprint with a little water to secure and adhere.

Letter B starting to take shape, tools used; brush to apply water on imprint and pointed wooden tool to shape the clay and run along edges to seal.

Fine tuning... adding more coil on each end and in the centre and shaping. Carving the edge for the border with a carving tool, still at the leatherhard stage.

Finished off by leaving to dry then sanded with a fine sanding pad for a smooth surface (in the raw stage ready for bisque).
Tuesday, July 20, 2010

Kim Schoenberger - 'A' ...a change of medium!

With all good intentions in getting a head start with my recycled teabags, I go and change my mind!
Once I explored my options in clay, the spark was ignited and I just had to go with it.
I have chosen to use Porcelain clay, and will be using different methods and techniques to create each letter. Seeing that they are so small and my kiln much larger, I have decided to complete the whole alphabet.... then place them in a bisque, glaze, then fire to Stoneware. So each image initially will be at the raw stage until I start firing in the kiln. And, I have decided to use red, black and white as my colour scheme.

Using a slabroller to make my 7 x 7cm tiles, firstly, I have to allow for shrinkage...each clay body has it's own shrinkage rate and at different temperatures. In this case I've allowed for 12% shrinkage. Fingers crossed the end result will come close to the desired size!

Great skill went into the design for cutting the tile, a round tin close to 7 x 7cm. Yep... that'll work, a flaten here and a flaten there, makes for a nice 7.84 x 7.84cm (must allow for shrinkage)square'ish shape...a test drive and it's a go'er!

Patience is a must in claywork especially in the winter months. Once the slab is rolled the tile can be cut...care must be taken as clay has a memory, if it is distorted at this stage and reflatened it will remember and distort back in the final firing. So it is left until the leatherhard stage (inbetween - wet & dry) before working on it
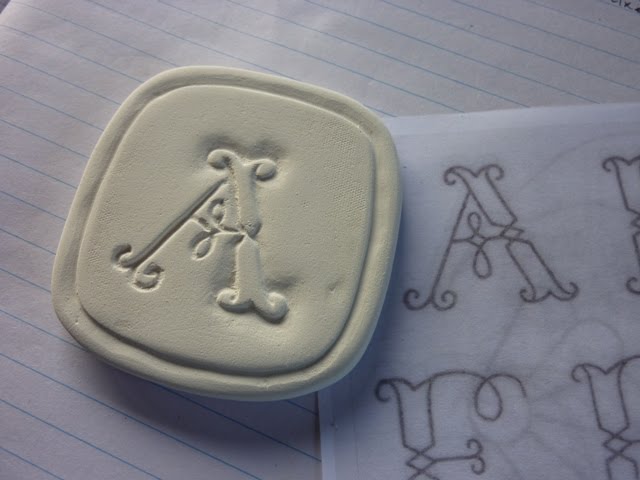
A - Carving technique: light pencil drawn to transfer letter with tracing paper onto clay the tile, with a carving tool cuts are made into leatherhard clay. Thought is applied to the angle of the cut to create a 3D effect. Carving at the leatherhard stage creates little beads of clay along the cuts these are left until the clay is dry enough to sand off which keeps the edges sharp and precise.