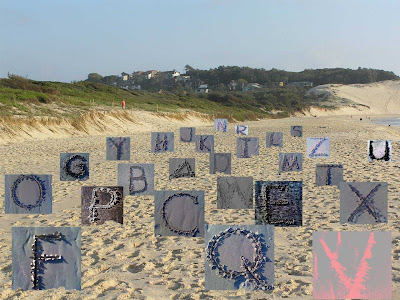
 Not sure if this is cheating! I drew the letters in sand and then manipulated them in Photoshop and deposited them on a different beach, also in Photoshop.
Saturday, January 15, 2011
Marg's Second Alphabet Finished
 Not sure if this is cheating! I drew the letters in sand and then manipulated them in Photoshop and deposited them on a different beach, also in Photoshop.
Thursday, January 13, 2011
Elaine's second alphabet final piece
Saturday, January 8, 2011
Alphabet 2 - Fiona's finished piece
This time I had a purpose - I planned to use the book as an exemplar when teaching my heartbeat script. I knew I wanted to use a concertina form and then set off, gradually adding letters to the book as they were finished.
Once I had attached all the letters, I then pondered for a while how I would complete the book. In the end I chose to maintain the concertina; but to contain the exuberance of the book by creating covers and 'tapes' that could be threaded thru some stitching to hold it together for most of the time. I also thought it needed a slip case, so covered one in nice rusted paper.
The book can be held in the hand and the pages turned; or it can be fanned out as a concertina. I like the flexibility.
Tuesday, January 4, 2011
Monday, January 3, 2011
Elaine's last letter...
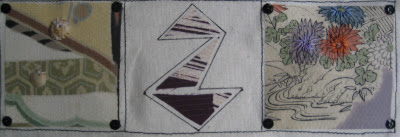
The Z row came together very quickly, the small shells just seemed the right decorations for one square and highlighting the flowers with simple embroidery on the other seemed to be all that was necessary.
A very big thank you Fiona for all that you have done, especially posting my work every month. I appreciate it very much! I am looking forward to continuing, many ideas are racing around in my head!
Sunday, January 2, 2011
Fin de l'alphabet
Oui, je sais, je suis carrément en retard pour les lettres du mois de décembre... Je vous présente mes excuses pour mon retard mais cela arrive parce que tout ne fonctionne pas toujours comme on voudrait, parfois, dans la vie...
Yes, I know, I'm totally late for letters of December ... I offer my apologies for being late, but it happens because everything does not always work as we want, sometimes in life ...
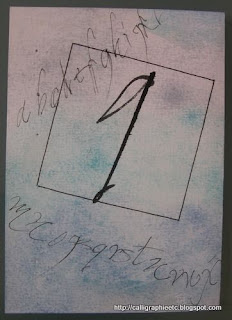
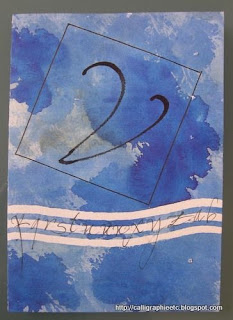
Donc je vous mets toute la fin de l'alphabet. J'ai continué les petits carrés à l'intérieur des petites pages, avec une grande lettre "dans le carré, et une composition de l'alphabet dans la page...
So I put all the end of the alphabet. I kept the small squares inside the small pages, with a large letter "in the square, and a composition of the alphabet in the page ...
Et voilà, je n'ai plus qu'à relier mes pages pour obtenir un album... C'était un peu long... mais finalement intéressant de mener un projet au long cours...
And now, I can only link my pages to get an album ... It was a little long ... but ultimately interesting to conduct a long-term project ...
Je vous remercie toutes et tous pour avoir partagé et montré tant de merveilles, tant d'idées (j'ai mis de côté des idées à essayer grâce à vous) et un énorme merci à Fiona d'avoir géré ce projet de main de maître. Je vous remercie aussi de votre accueil.
Thank you all for sharing and found so many wonders, both ideas (I put aside ideas to try thanks to you) and a huge thank you to Fiona have managed this project masterfully . I also thank you for your welcome.
Bonne journée
Good day
Wait for me ...
This has been bubbling away in my mind for months, but with trying to get WordsWork into production, printed and sent to all our contributors and ASC members before Christmas, it has been simmering on the back boiler. Not to mentions Colophon ...
... so, this alphabet is done on the canvas I have been using all 2010 for various projects. The original idea was a 1.8 metre square stretched canvas - but who's got space for one of those!
For this project I have taken some of the bits already painted on, and applied more letters and splatters.

See you in the next blog! (Hopefully on time.)
Meg
A little bit of information...
This blog will continue to exist into 2011, as we post our final pieces and keep all the work from 2010 here. As we finish our last letters, and finalise our pieces, please continue to post them here.
We have started again for 2011 - and over here is where we'll be posting all our new stuff. So stay connected to the two for a while; interesting bibs and bobs will appear both here and there!
Go well, Fiona
Saturday, January 1, 2011
Kim Schoenberger - XYZ
I chose to use my most favourite piece in this alphabet to finish the last two letters using that technique with clay inlay. It happens to be 'P' -dots created by the pointy end of a stick, well, a pencil really.
XYZ - Techniques...
Y - Freehand marking - with red porcelain slip inlay
Z - Carving
(The image is a tad small, to see the detail you can enlarge it by clicking on the image.)
X - Inlay with red porcelain slip
Transfered the letter lightly onto the clay tile using the transfer paper, then X marks the spot, dots with the pencil. Filled with red porcelain slip, left to dry a little....
Kim Schoenberger - UVW
UVW - Techniques...
V - Negative Print - with red porcelain slip
W - Negative carving - with black underglaze (Reverse to V)
Method of making...
U - Woodcut Print with black underglaze
I've been at this one to conquer for sometime now, with each attempt amounting to dissapointment. And you could say that it was U that held up progress (plus xmas, new year etc...) to completing my ALaW in time. Not wanting it to get the better of me, I left it until I had optimine time to devote 100% head space to retry.
My adjustments I needed to re-address were (and many).
- The initial carving needed to be deeper, so off to buy real (sharp) woodcut tools!
- Always remember to carve your letter backwards, just as well the first attempt was a fizzer (and on a test tile).
- Re-adjust the thinking to clay and not paper as in the workshop, of course Kim...this should have been your first thought, huh.
- Using black underglaze (not ink) resulted in different tackiness, well no tackiness at all actually. Hence the printing ink roller was not suitable, out with the sponge roller, a test run, and wolla, yay, as easy as that!
The techniques for the next two letters are taken from this idea of the woodcut print process, minus or adding some steps to suit the clay.
V - Negative Print with red porcelain slip
Instead of carving into wood I've carved deeply and directly into the clay with a carving tool. Then with a sponge roller loaded with red porcleain slip, I've rolled over the clay tile to print a negative letter V. Being careful not to get any slip into the carved letter, as in the ink printing method.
W - Negative carving with black underglaze
Reverse to V - Instead of carving the letter first I carved it last. Using the sponge roller again, this time loaded with black underglaze I've rolled over the whole tile completely covering it with black. When touch dry I've transfered the letter W into the clay tile (gently) to make an imprint, then carved the letter and border.


